I promised in a previous post that I would share a detailed explanation for how to place subtitles or lyrics directly on a video using a powerful piece of free software, VLC Media Player. This is the easiest and best way to do it that I’ve seen, and the approach I used for “The Zoom Where It Happens”.
Here are the steps:
A. Create your subtitle file in YouTube
You can do this at whatever point the audio in your video is more or less correct. The video doesn’t really matter for this. What matters is that the words that are spoken or sung in your video and their timing are pretty much finalized and not likely to change. For songs, this should be pretty straightforward.
- The easiest way to do this is to make sure you have a script or a lyrics document with all the words that are spoken or sung in your video. You may want to make a temporary copy of this document that only contains the words spoken or sung, line by line, without speaker attributions, stage directions, or the like. If your song has a repeating chorus, make sure you copy and paste all the repeats where they are sung so that proper subtitles will appear where they belong.
- Upload your video to your YouTube account. You are going to leave the video as private, since this is not a version of the video you are ever planning to share with anyone. (You’re going to delete it later, but I recommend you wait until the final version of your video with captions is complete and ready to be released. That way, you can always come back and make adjustments to your subtitle file without having to do these steps over again. Note also that this is a useful step because YouTube will scan your audio for any content that might put limits on how your video can be distributed or monetized, such as the use of copyrighted material. You are allowed to use copyrighted material, but if YouTube is going to place any limitations on you, it’s good to find that out and eliminate surprises before you’re ready to release your video.)
- Open YouTube Studio on your computer, and under Content, edit your temporary private video. (Subtitle editing isn’t supported on mobile devices.) On the left, select Subtitles.
- This will take you to a list of Subtitles for your video. There should be one listed. Click Add or Edit.
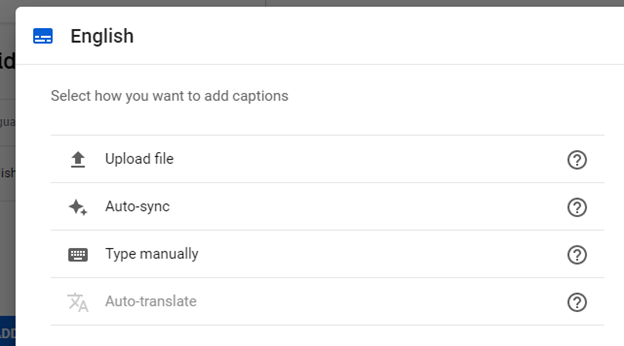
- At the following prompt, select Auto-sync.
- Copy and paste all the spoken or sung words from the document you set up in the first step. It may take a few minutes for YouTube to auto-generate timings.
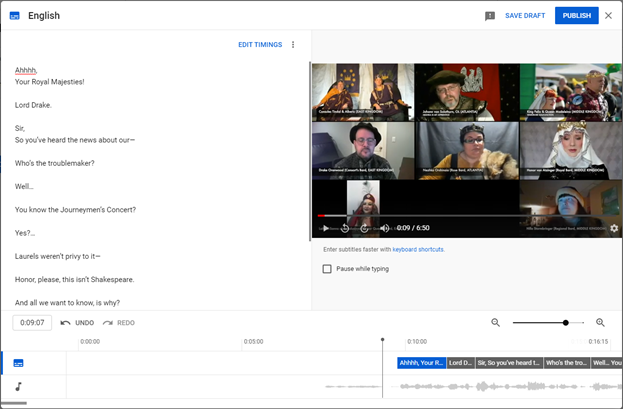
- When the timings have been generated, click Edit Timings. You will be presented with a list of the lines as YouTube has broken them out, and a visual timeline that allows you to adjust and move lines, and where they start and end, using your mouse. It’s very intuitive, and the play button lets you check how things line up.
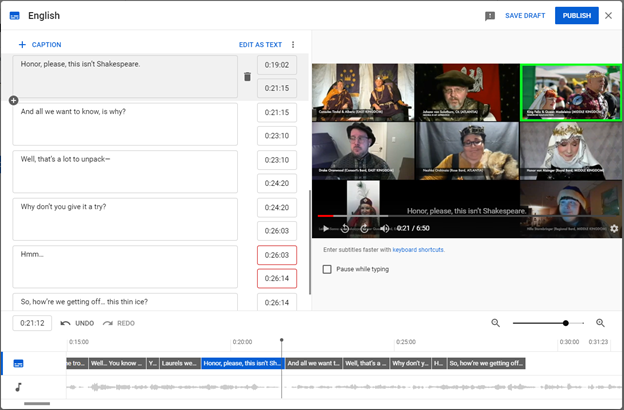
Note the following:- For videos of any length, there’s a very good chance that the auto-timer will get hopelessly confused partway through the video, and have sections where a few lines are ridiculously long, followed by dozens of short lines, none of which are properly aligned, and which will take some time and effort to align properly. Nevertheless, this is still almost certainly the easiest way to get the words and the timings lined up correctly.
- Don’t forget to click Save Draft periodically to make sure you don’t lose your changes.
- Pay attention to any discrepancies between the words you pasted in, and the words that are actually being sung or spoken in the video. All things being equal, you should adjust the captions to match what’s actually being said (or you may want to get your performers to fix the video if they’ve made a mistake).
- You should feel free to let the subtitles drop out for moments when no one is talking or singing.
- If there are multiple parts being sung, focus on subtitling the part that is most differentiated or specific (if the chorus is repeating a hook line while a single character is singing something else, it probably is more helpful to caption what the single character is singing).
- When you’ve played through the video and you’re happy with everything, click Publish. (Remember, the video is still private, this just saves your changes to the subtitles as the current version. You can always come back and edit them again later to make adjustments.)
- Next to the Edit button are three dots that let you choose other actions. Click on this, then choose Download, and .srt for the format.
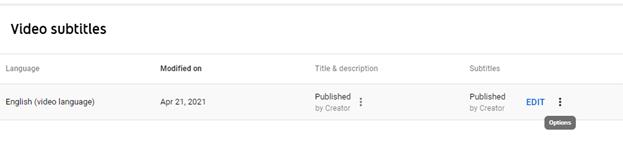
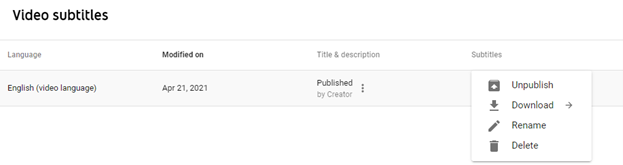

- Find the “captions.srt” file that was just created in your Downloads folder (it may have a version number if you’ve done this a few times), and take note of it, or move it to a working folder for the next step.
B. Add the subtitles to your video with VLC Media Player
Note: I’m going to show you how to add captions using VLC Media Player for Windows. While VLC Media Player is a cross-platform application, I found the Windows version the easiest to use. The file management is quite different for the Mac version, and I never was able to convert my videos properly.
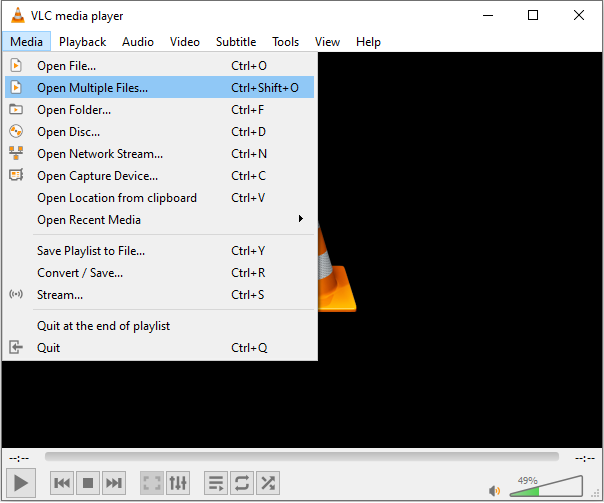
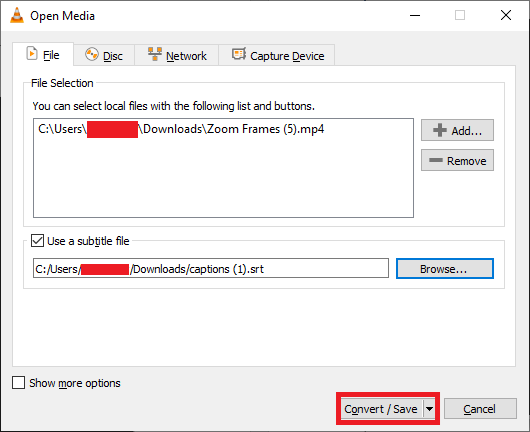
- Open your video and subtitle files.
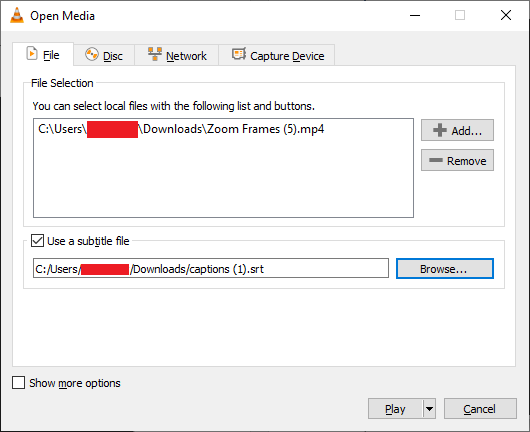
Select the files you want to use, then click Play, which sets the default for the next part of your session to show you your video with the subtitles on your media player screen. - Set subtitle preferences.

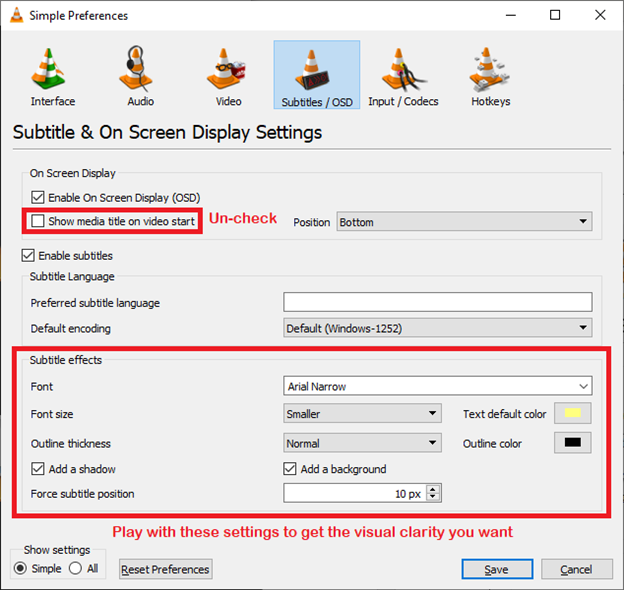
- Now, hit the Play button on your media player, checking different sections of the video to see whether the subtitles are displaying properly. Is the “splash zone” where the subtitles are displaying covering anything important visually? Does your font, size, color, shadow, and choice of background or not make the subtitles easy to read without being unnecessarily distracting from the video? Try different settings until you are happy with what you have.
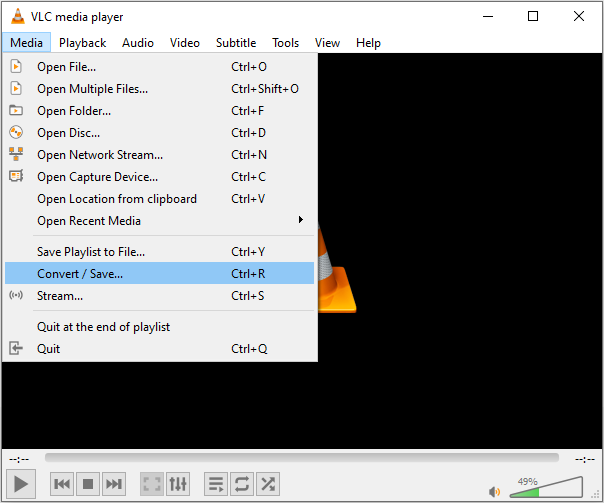
(The settings you save will remain in place as long as you don’t Reset Preferences. Be careful with that button!) - Convert the video by selecting Convert / Save.
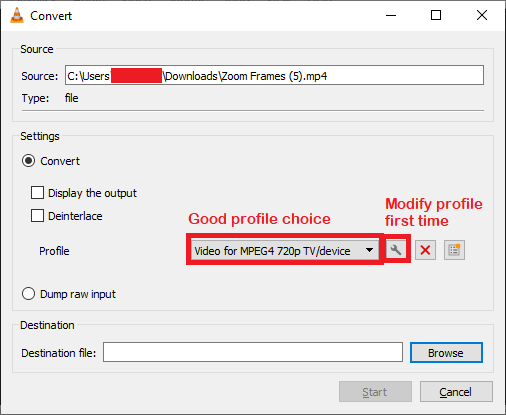
- If you are modifying your Profile settings because this is the first time you’re converting a video, here are the recommended profile settings (you probably shouldn’t even touch anything else unless you know what you’re doing):
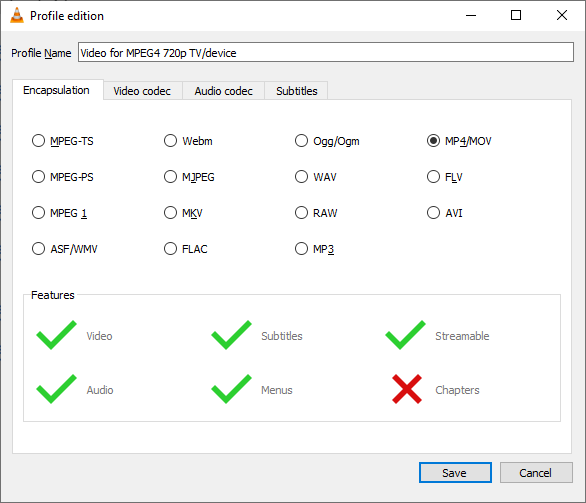
- Encapsulation should be “MP4/MOV”.
- The main thing to adjust on the Video codec is the Bitrate, which determines the quality of your output video. Either match the quality you used in your source editor, or just set it to 10,000+. (Critical note: Be sure to use the up/down arrows to set the Bitrate rather than manually entering a number. If you enter a number that isn’t an appropriate multiple, you’ll get error messages later and your conversion will fail.)

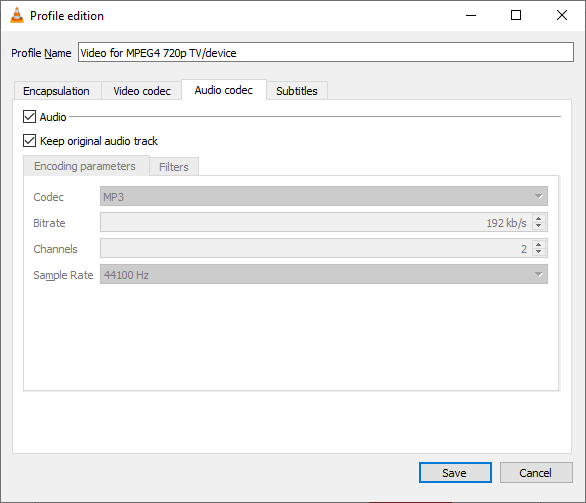
- For Audio codec, select “Keep original audio track”. The goal here is just to add subtitles. There’s no value in modifying the audio from your source video; the only thing you can really do is lose quality.
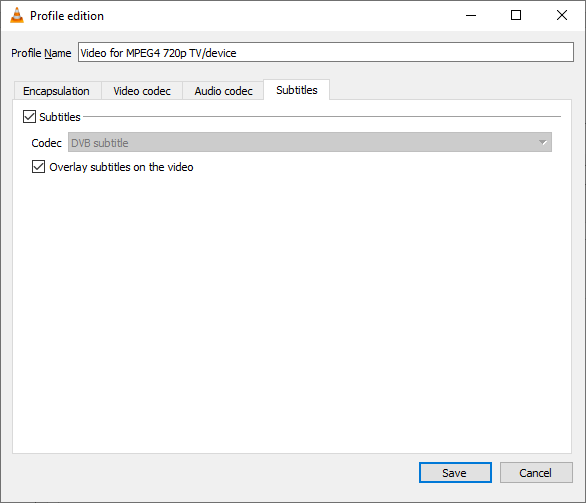
- Finally, for Subtitles, make sure you check both boxes. This is the crucial setting that will make sure your subtitles are actually added to the converted video.
- Save your Profile.
- Encapsulation should be “MP4/MOV”.
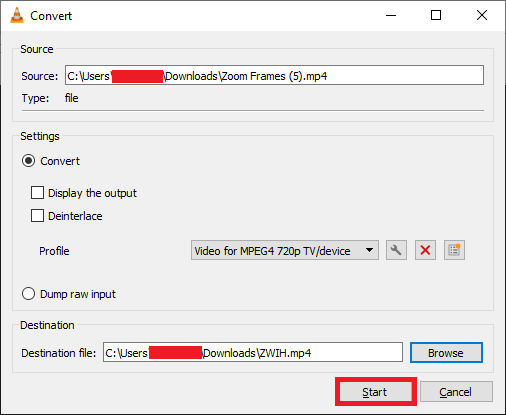
- Now, click Browse to select where you will place your Destination file (do not choose your Source file – feel free to give the output file a new name). Then, click Start.
If you have selected an existing file, you will be prompted whether to overwrite it.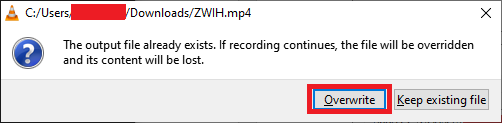
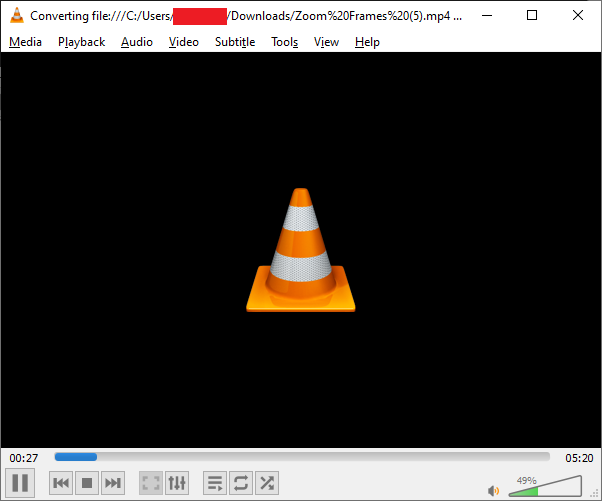
(Keep existing file will cancel the conversion but keep the settings you’ve selected, so you can just press the Play button on your player to be prompted again, and pick a different Destination file name. If you want to double-check your settings without creating a file, select Media / Stream… and click the Stream button on the prompt.) - The conversion process will display on the player. If you checked “Display the output” in the previous screen, you will see the conversion as it appears, but if you don’t select that, the conversion process will be a little faster since it doesn’t have to show it to you in real time.
C. Review your work
Open the newly-created video file and review the results. Make sure everything still looks and sounds the way you wanted it to, and the video quality is high enough for your satisfaction.
And there you go! I look forward to seeing your videos.
Drake
